How to Create a Stunning Fluid Bear: A Step-by-Step Guide
In the world of art, Fluid Art is loved for its flowing, unpredictable beauty. Fluid Bear takes that style and pairs it with a cute, sculptural form to create pieces full of dreamy color.
Whether you're brand new to art or already have some experience, this guide will walk you through fluid art from the ground up. We'll start with the basics — materials, paint mixing, pouring techniques, mold use — and even how to give your piece a unique personality and shine.
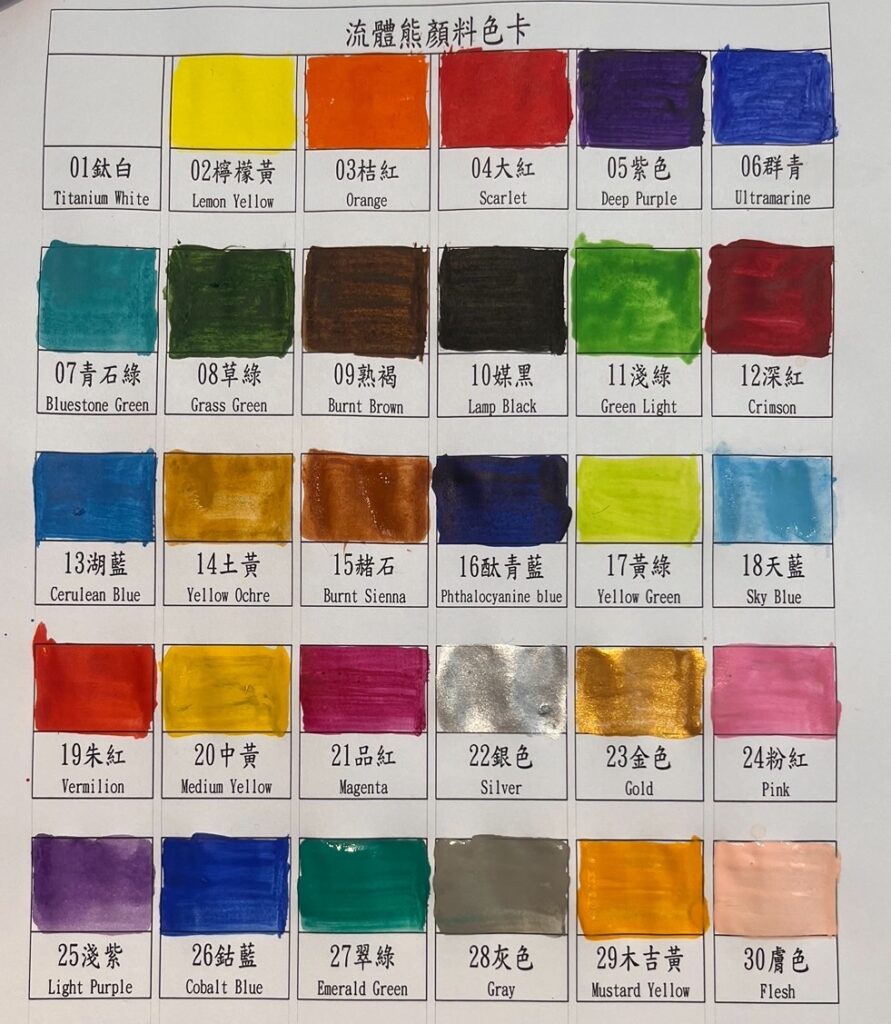
Color selection and mixing
When you create a Fluid Bear, your color choices set the entire mood and visual feel. You can use "layering," "contrast," or "complementary" techniques to give your Fluid Bear a totally different artistic style.
1. Layered palettes (soft gradient, harmonious flow)
Best for dreamy, soft styles with delicate transitions.
- Suggested palettes:
- Ocean: Deep blue + light blue + pearl white
- Sunset: Orange + pink + gold
- Forest: Dark green + light green + brown
2. Contrast palettes (bold contrast, strong visual impact)
Best for bold, vibrant, high-energy styles.
- Suggested palettes:
- Streetwear cool: Black + neon green + purple
- Fiery blaze: Red + yellow + black
- Future tech: Silver gray + electric blue + bright purple
3. Complementary palettes (opposites, rich depth)
Best for balanced, dynamic, richly textured styles.
- Suggested palettes:
- Water meets fire: Blue + orange + white
- Magical contrast: Purple + yellow + teal
- Cosmic galaxy: Deep blue + gold + dark purple
Tips
- Metallics, neons, pearls: Add shine and give your Fluid Bear more depth and dimension.
- Leave some negative space: Let colors flow and transition naturally without getting muddy.
- Test first: Try your colors on a small canvas before committing to the real piece.
Now pick your three favorite colors and start creating your own dreamy Fluid Bear!
Small amounts, lots of variety
How you pour the paint affects the depth and flow of your Fluid Bear. The "small amounts, lots of variety" technique creates more refined gradients between colors and avoids the muddy mess of over-blending.
How to do it
- Pick your colors: Prep 3 or more paints in separate mixing cups.
- Pour small amounts: Each pour should be about half the cup's bottom — don't pour too much at once.
- Stack in layers: Slowly pour from the rim of the mixing cup, alternating colors in multiple small additions so the colors interlace and form layers.
- Mix up the order: Don't always pour in the same sequence. Vary it to create more organic textures.
Tips
- Leave gaps between paints: A slight gap between colors creates richer lines and textures as the paint flows.
- Pour from different heights: Lower pours stay concentrated, higher pours spread and blend more.
- Add metallics or transparents: A small amount of gold, silver, or transparent paint adds depth and shine.
With "small amounts, lots of variety," your Fluid Bear gets more refined, intricately layered color shifts — and your piece becomes uniquely dreamy.
Slow and steady wins the race
When you pour onto the white bear blank, going slowly is what decides your final color, texture, and depth. Don't dump everything at once — take the "slow and steady" approach and let the paint flow delicately to create softer gradients and finer textures.
How to do it
- Control the flow:
- When pouring, don't pour too fast. Let the paint cover the blank in a slow, thin stream so colors don't spread too much or over-blend.
- Tilt the mixing cup so paint flows gently off the rim instead of being dumped straight in.
- Choose your pour direction:
- Horizontal pours: Move slowly from one side to the other to create wave-like flow and layers.
- Vertical pours: Top to bottom for natural drip lines or waterfall effects.
- Random crisscross: Switching directions creates more varied, organic patterns.
- Stay patient:
- Avoid over-stirring — let the paint flow naturally and create its own unique textures.
- Watch how the paint moves and adjust your pour location to keep the color evenly distributed.
Tips
- Rotate the blank: Gently turn the bear blank now and then to let paint flow naturally and create more dynamic visuals.
- Pour in stages: If you're not happy with the first round, layer more paint to build up color depth gradually.
- Use droppers or mixing sticks: For fine details, add paint in small spots with a dropper or stick to boost the subtle variations.
With careful pouring technique, your Fluid Bear gains gorgeous, harmonious color layers and that signature flowing, dreamy beauty.
Know when to stop
In fluid art, knowing when to stop is the key to not over-working a piece and turning the colors muddy. Fluid art is all about natural, flowing beauty — too much tweaking ruins the layers and visual effect.
How to know when it's time to stop
- Light touches only
- You can use a brush, dropper, or mixing stick for small accents — adding detail, pulling lines, or creating signature flowing strokes.
- But don't keep adjusting. Constant tweaks blend the paints back together and the colors turn muddy and flat.
- Let it sit and watch it transform
- After each pour, let your piece sit for a few minutes and watch how the paint moves.
- Don't rush to add or fix things — the magic of fluid art is its unpredictability. Let the paint do its thing and you might get textures more beautiful than anything you planned.
- Done is better than perfect
- Once the color distribution, layers, and flow all hit the mark, it's time to step back. Otherwise, you'll "tweak it to death."
- Small imperfections? Embrace them. Those one-of-a-kind details are exactly what makes fluid art so charming.
Tips
- Tap or tilt: If paint isn't spreading evenly, lightly tap the piece or slightly change the tilt angle. Let paint move naturally instead of forcing it with a brush.
- Avoid re-mixing: Once the paint starts to settle, don't disturb it — you'll wreck the natural textures.
- Give it time to set: Let the piece sit for at least 24 hours until fully dry before any finishing work like sealing or coating.
"Knowing when to stop" is one of the most important mindsets in creating a Fluid Bear. Learn to step back at the right moment and your piece keeps its most natural, beautiful flow.
Further reading
- Taipei Fluid Bear Guide: Pricing, Sizes & Booking
- Fluid Art Experience in Taipei: Pricing & Beginner's Guide
- Taipei Handmade DIY Guide: 5 Therapeutic Experiences
Want to try Fluid Bear right now? Add Made Studio's official LINE account to book — you're 30 seconds from MRT Zhongxiao Dunhua Station, ready to create.